How to Publish a Survey on the Thank You Page in Shopify
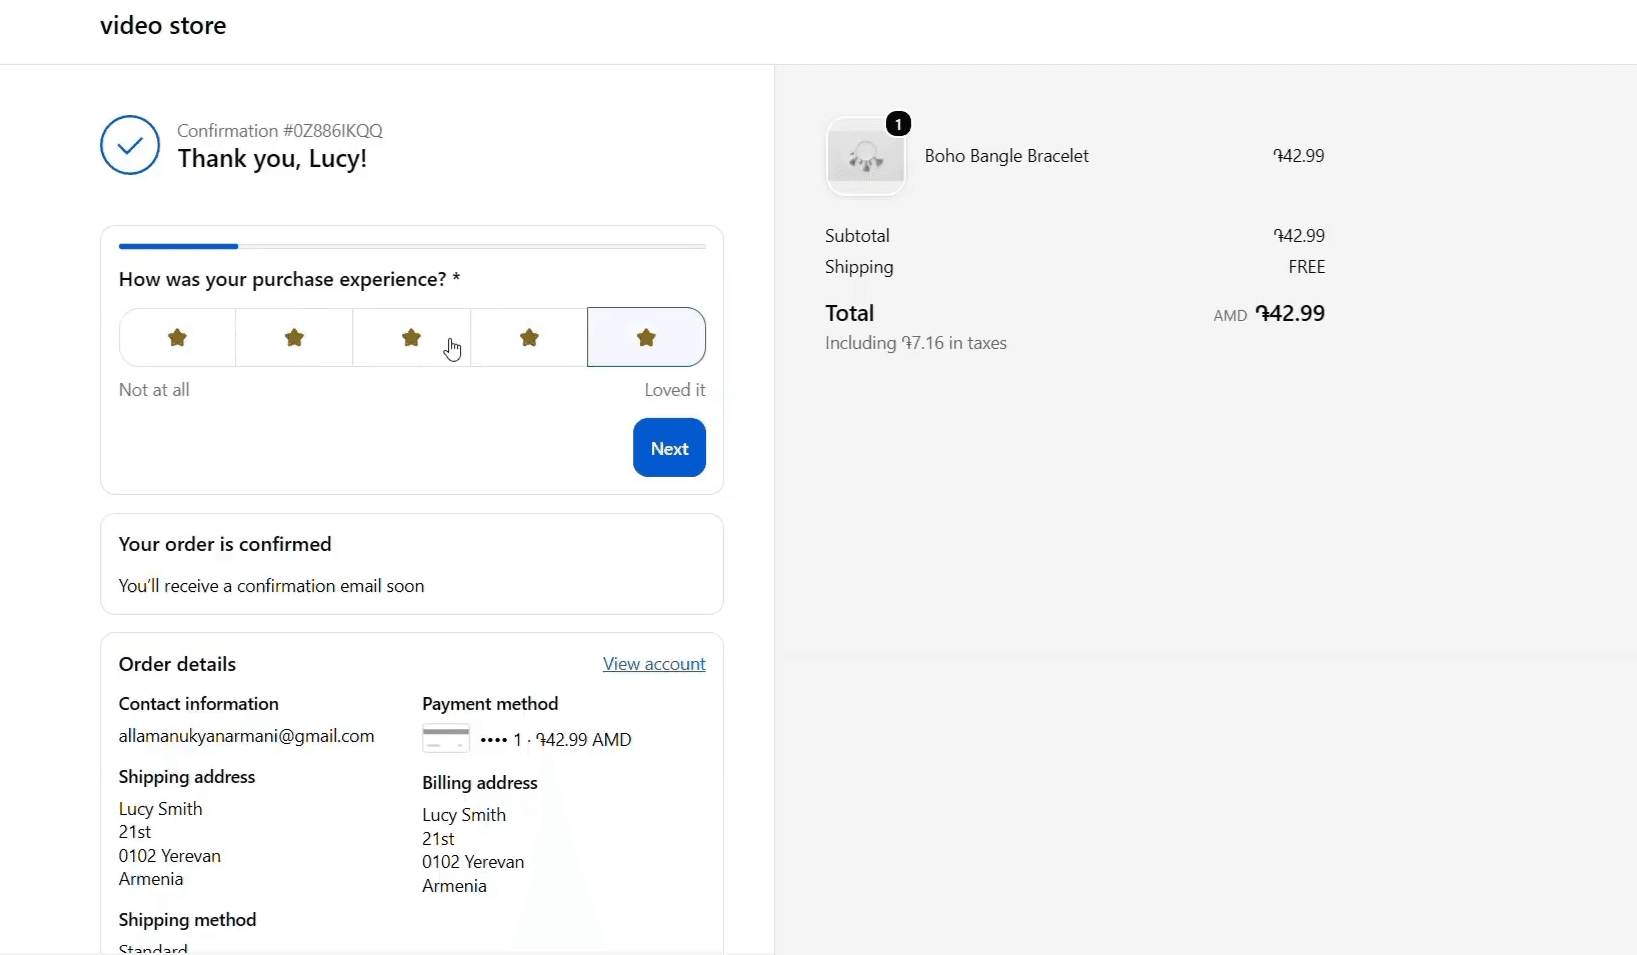
It’s very possible that you’re not using one of the most valuable and underused touchpoints in your Shopify store: the thank you page. Traditionally, it simply thanks the customer for the trust they put in your brand. But wouldn’t you, as a merchant, also want their opinion on the purchase process, why they made that purchase, or even where they heard about you?
These answers tell you where to put your marketing, where to invest, and what to improve — and no one can give you better answers than the people who buy from you.
Surveys are a great way to find out what’s bothering your customers or, conversely, what’s working best for them. The smarter way to use them is on the page where you’ll collect the most answers. The thank you page is known as one of the best places to ask, because customers’ attention is fully focused right after the purchase. That also means a higher chance they complete your survey — exactly what you want.
In this article, you’ll learn how to publish a survey using the right survey app for Shopify , plus a few tricks that make thank you page surveys work better.
Why use thank you page surveys on Shopify?
Customers are more likely to complete a survey and share information right after buying. That’s one reason, but there are more.
Collecting zero-party data
Zero-party data is information customers intentionally share with you. The thank you page provides explicit data about preferences, buying intentions, and demographics, without you making assumptions based on third-party or first-party data.
Solving the attribution problem
Platforms such as Meta, TikTok, and Google struggle to track attribution accurately because of privacy restrictions. An attribution survey on the thank you page lets you get the answer firsthand from the customers who visit you.
Personalization and segmentation
This is about what you do with the data you collect, and it’s one of the biggest reasons people run surveys in the first place. Feed responses into a marketing app like Klaviyo or Mailchimp, then build audiences based on preferences and make your email marketing customer-specific.
How to publish a survey on the thank you page in Shopify (step by step)
A great post-purchase option for Shopify is the post-purchase app for Shopify app. It gives you everything you need to create a survey, including many pre-made ones, plus extras like survey branching, multiple question types, detailed analytics, and specific targeting options. Here’s how to publish a thank you page survey with Apricot.
Step 1 — Install the app
Install Apricot from the Shopify App Store. Before you do, it helps to see what the final product could look like — try the survey demos in Apricot’s demo store.
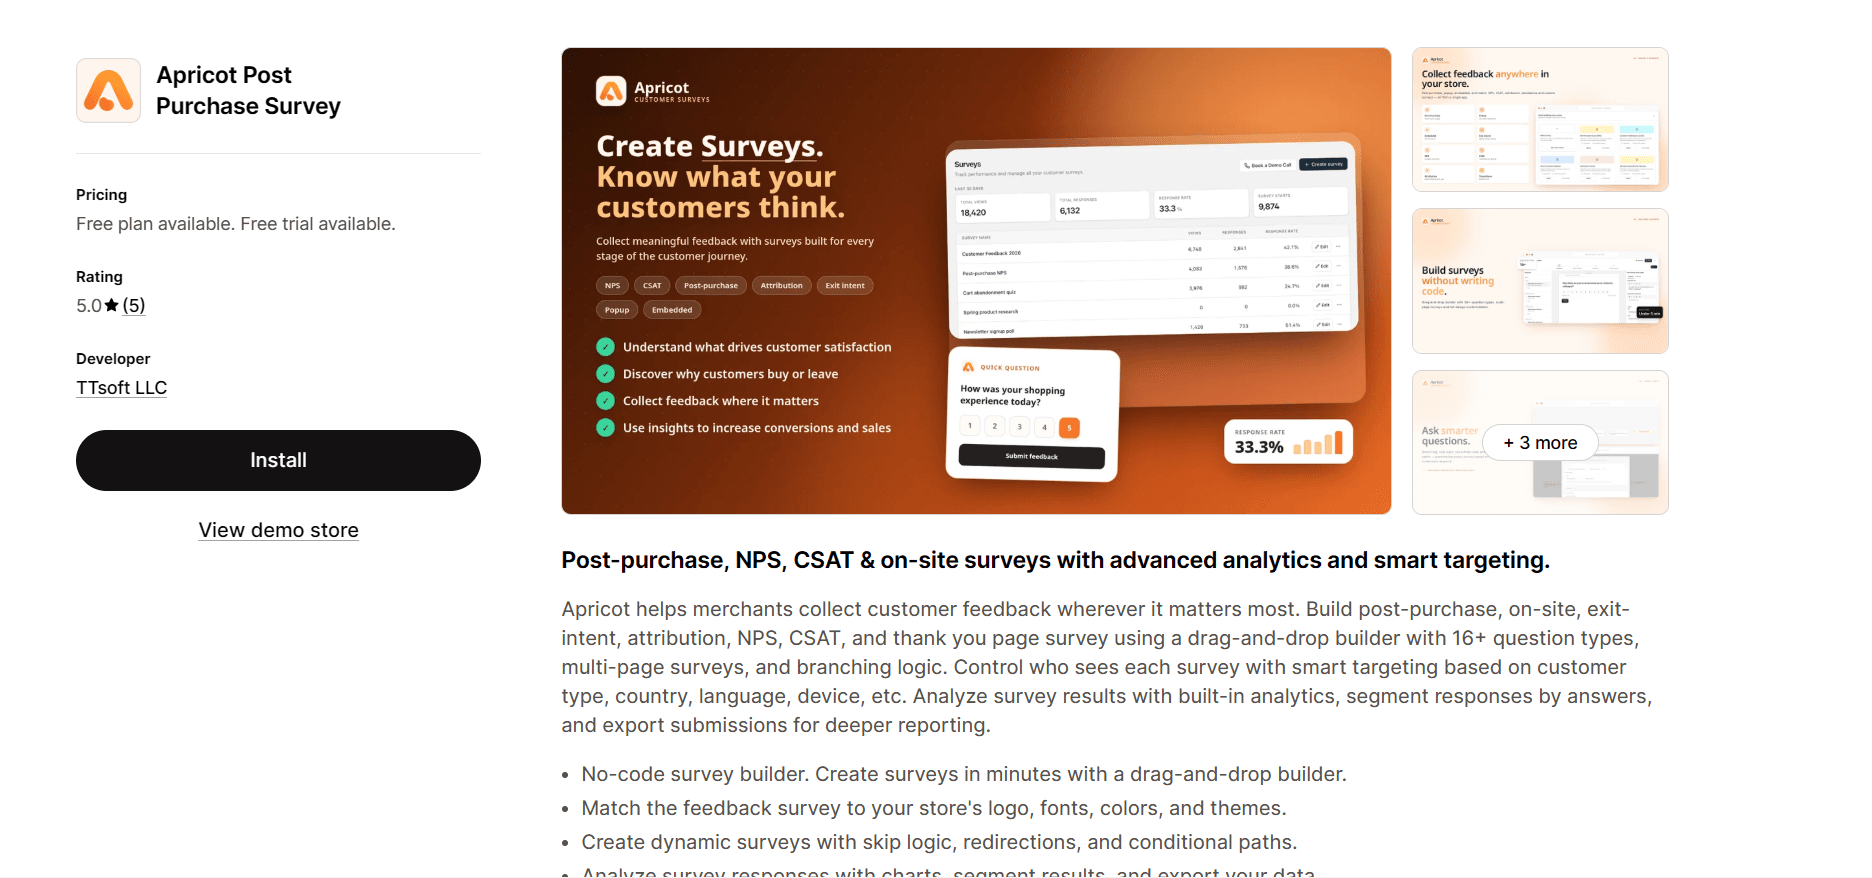
This is quite self-explanatory; just install Apricot in Shopify. Before you install the app, you might want to look into what the final product that you want to create looks like. In Apricot’s demo store, you can try survey demos to get an idea.
Step 2 — Create the survey
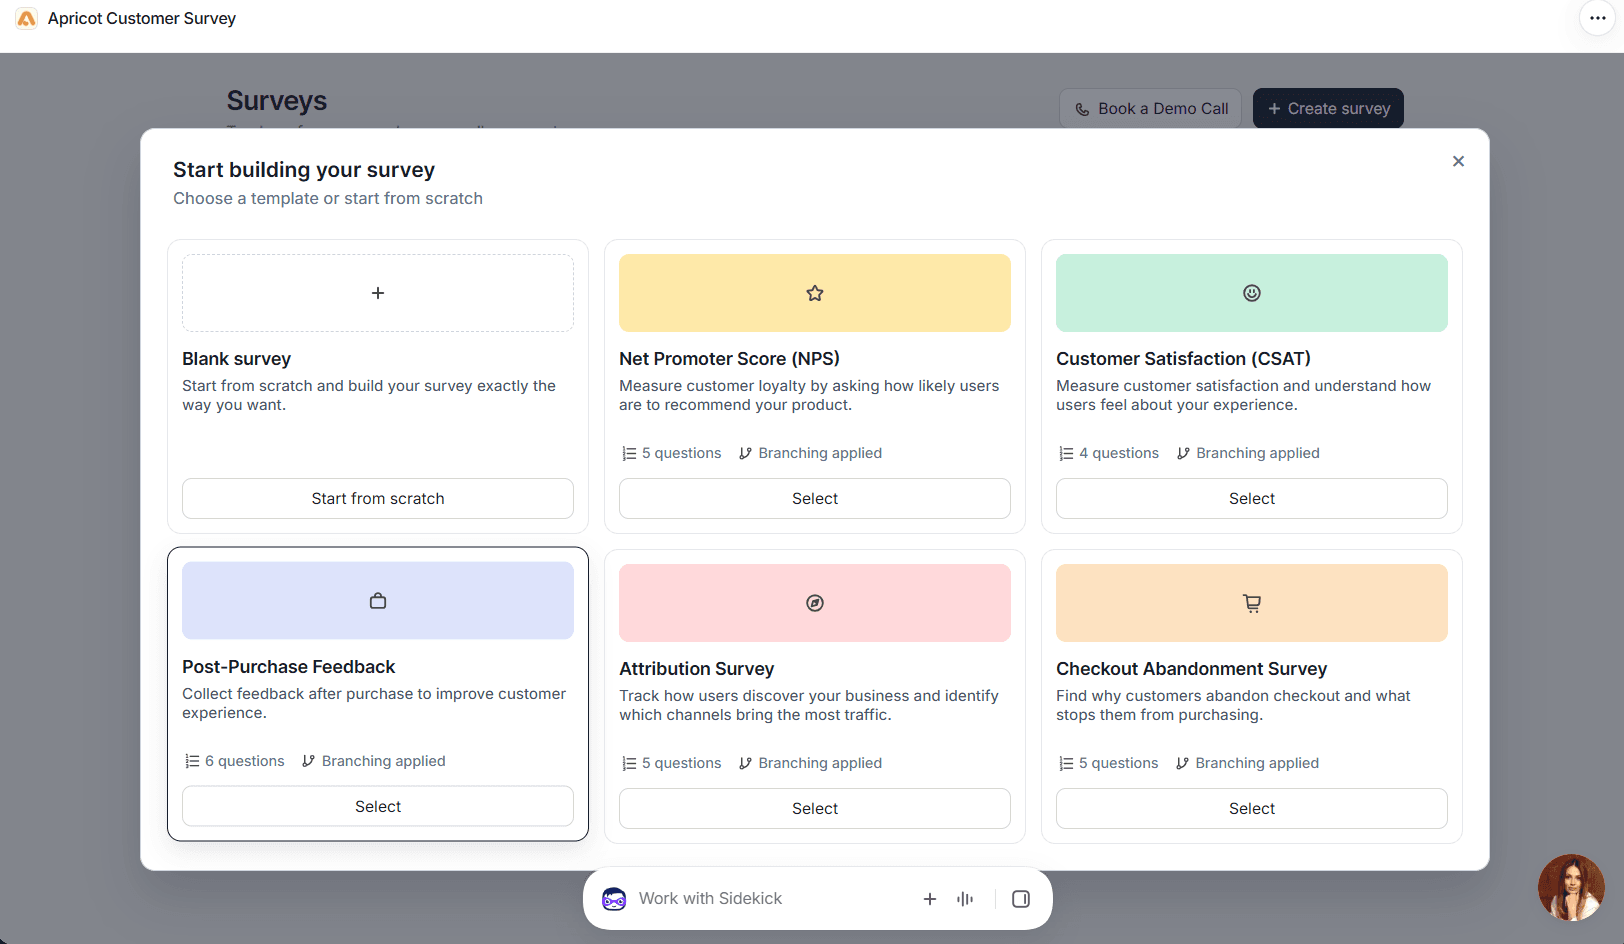
Click “Create Survey” on your dashboard and you’ll see two options: choose a template, or build your survey from scratch. For thank you page surveys, it’s usually an attribution survey or a post-purchase survey.
Step 3 — Customize, configure, and edit your survey
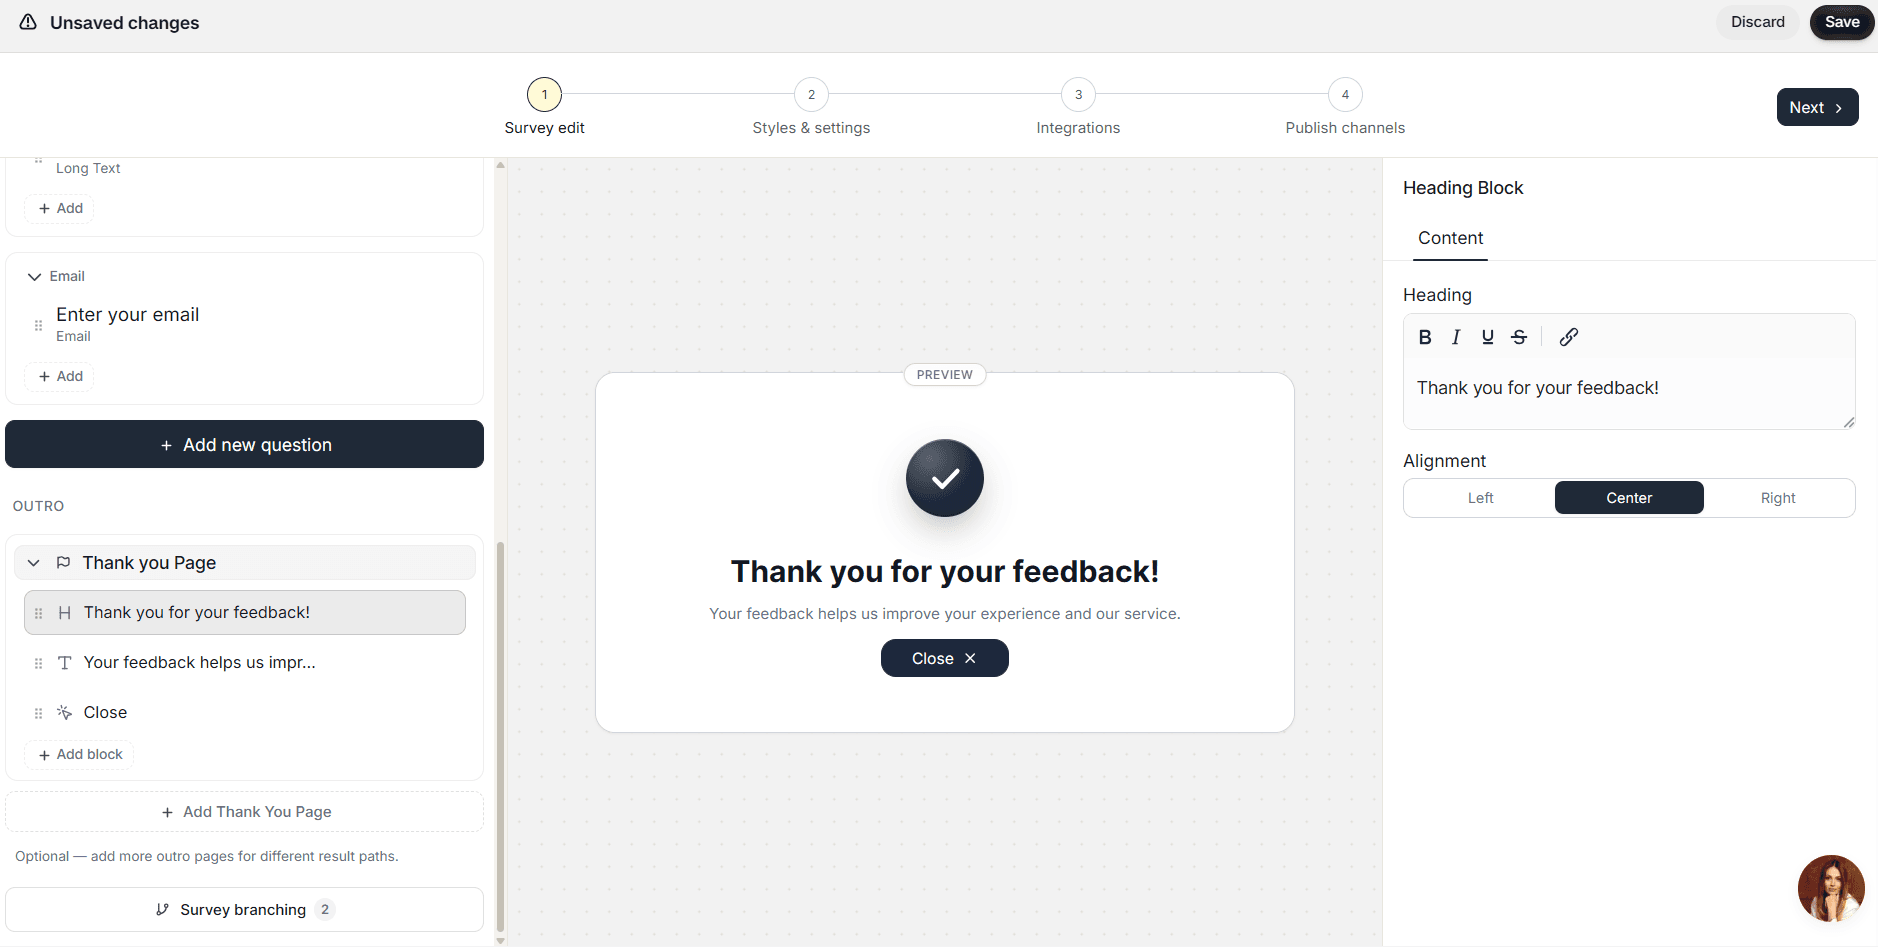
Add questions or edit the existing ones. Question-specific settings let you make a question required, randomize choices, add an “Other” option, and more.
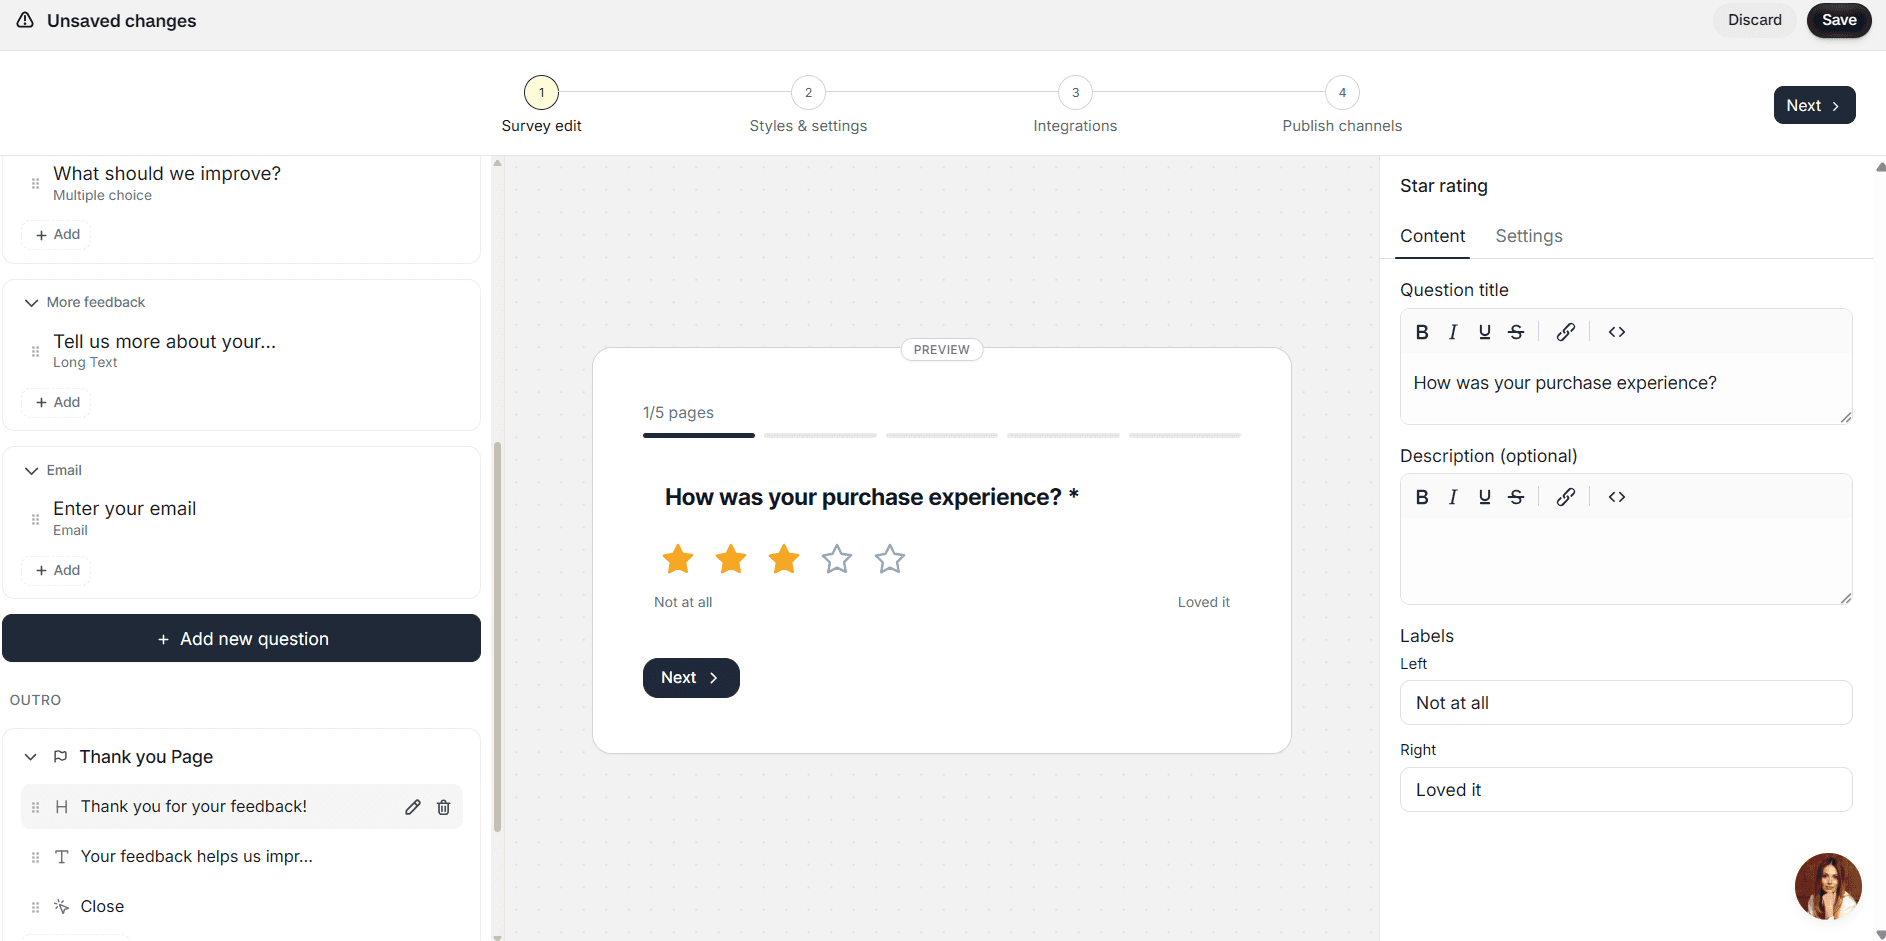
You can also edit the thank you screen itself by changing the text and adding buttons and animations.
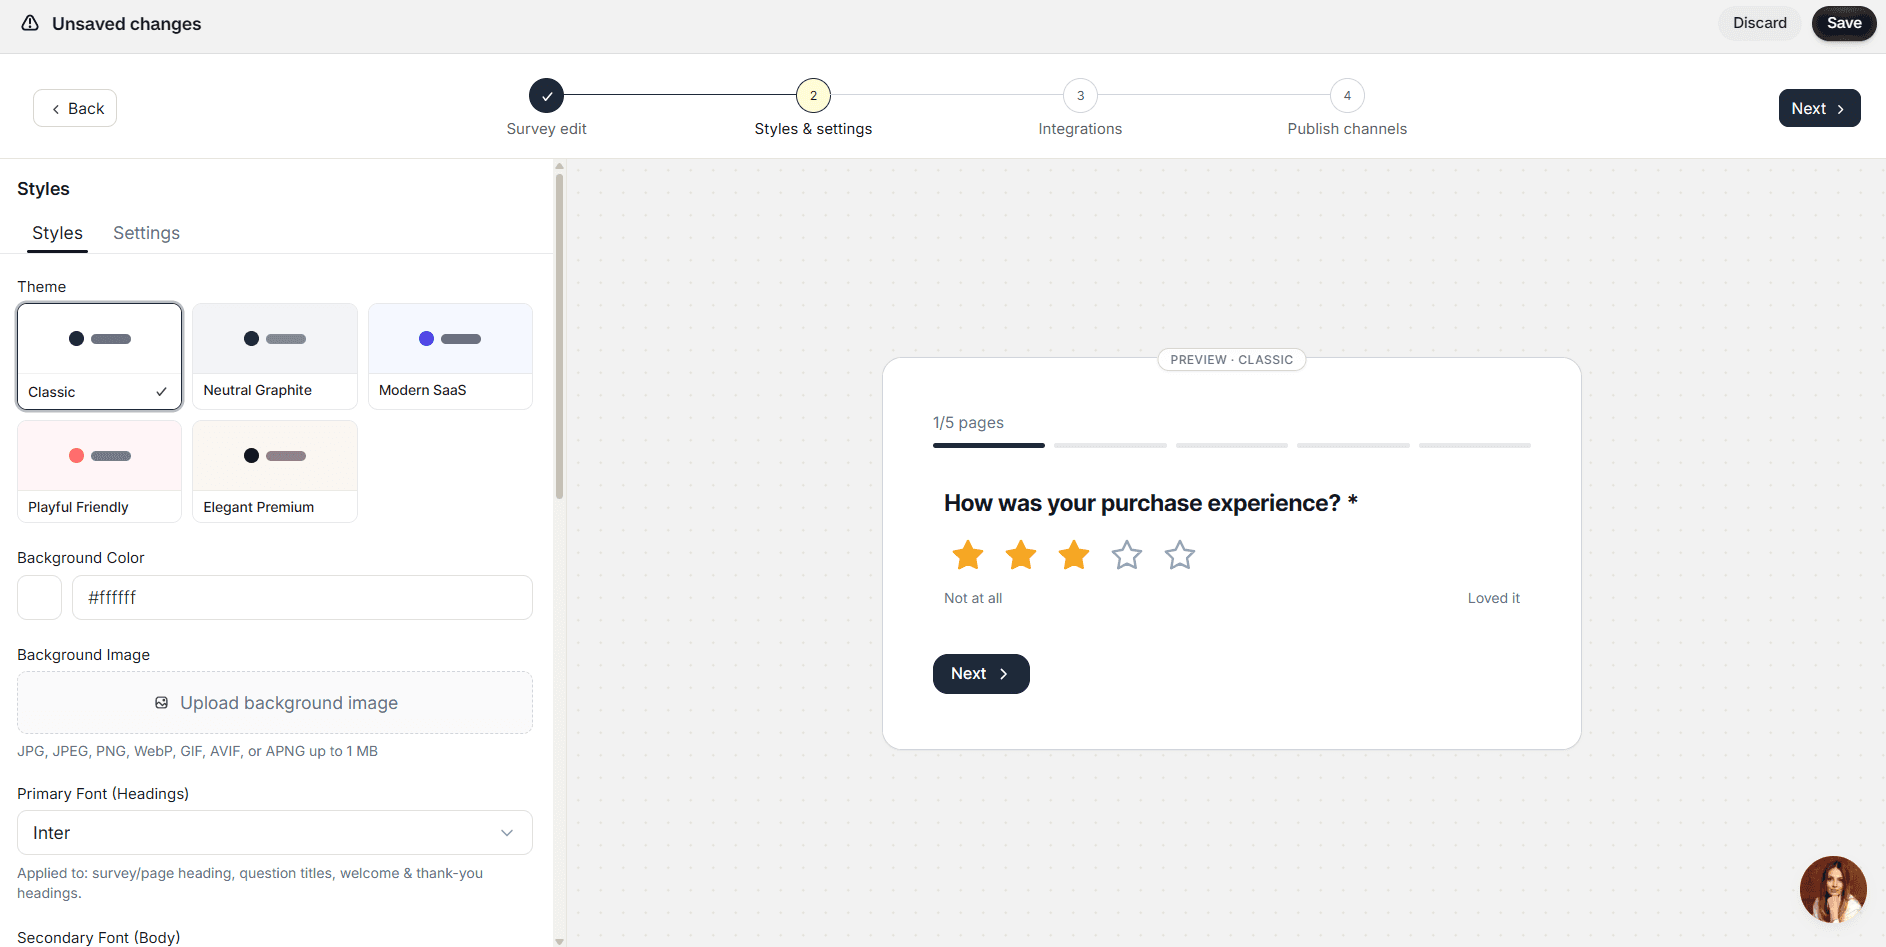
To change the look of your survey, go to the settings tab, where you can adjust themes and colors.
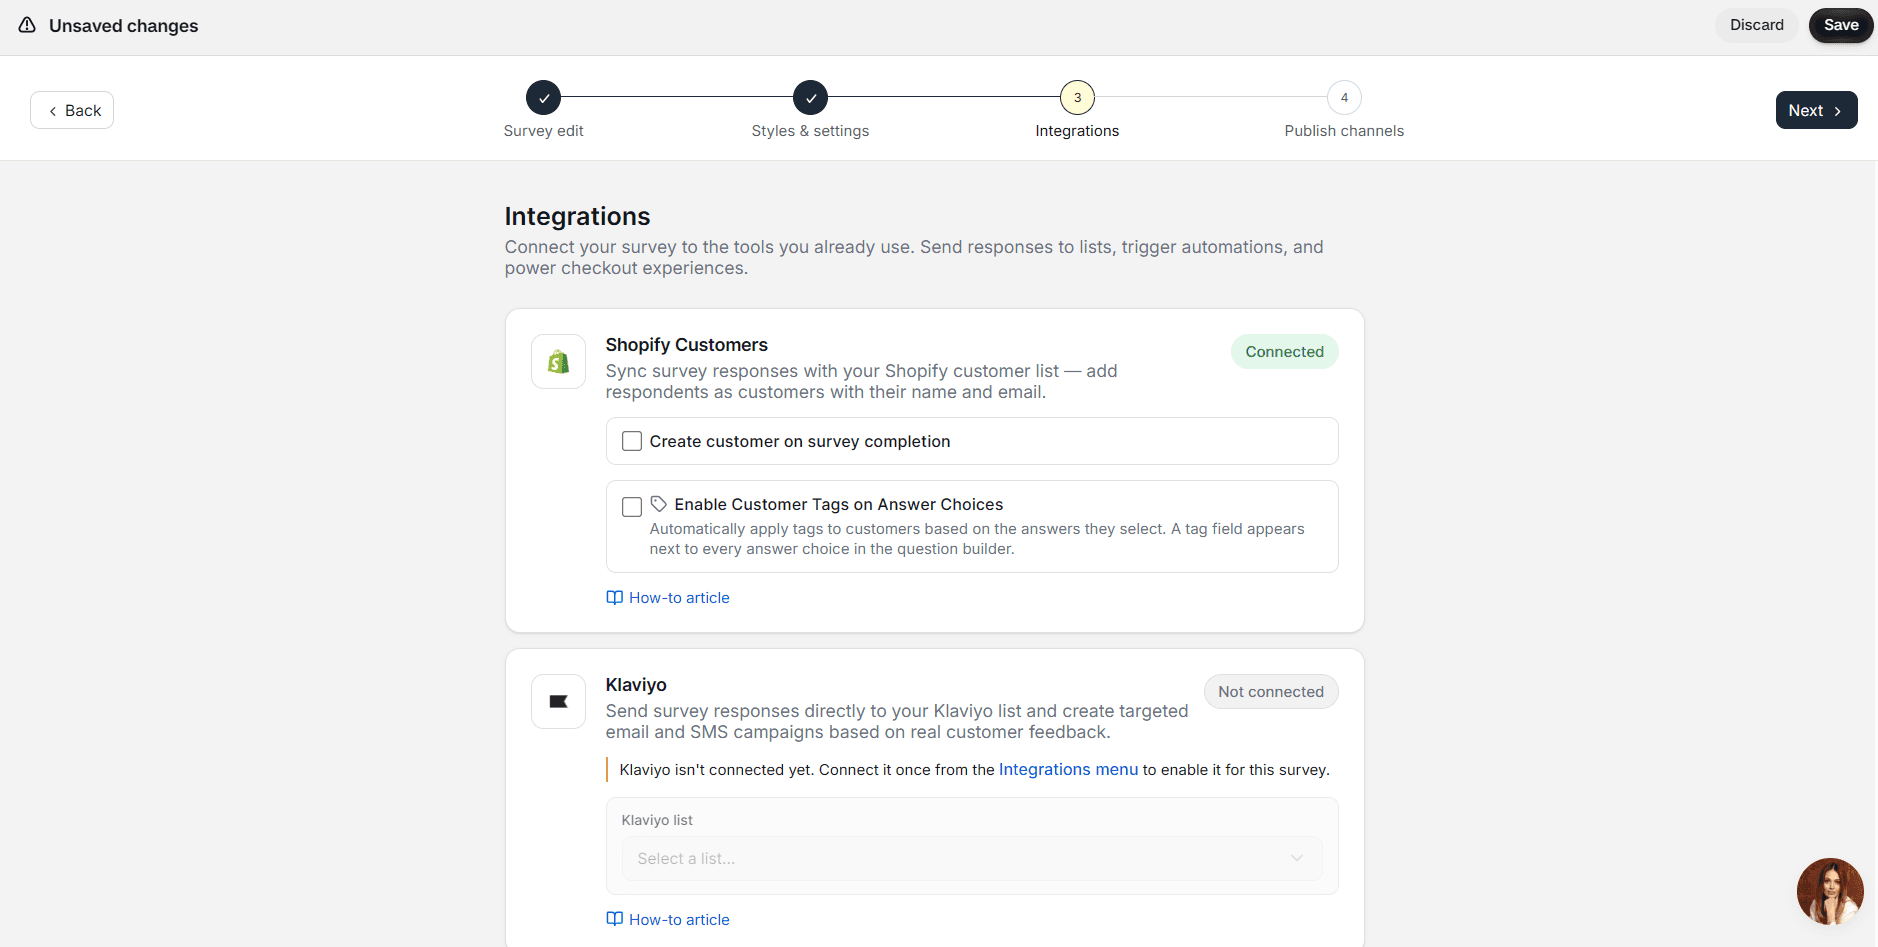
The last tab before publishing is “Integrations,” which connects your survey to third-party marketing tools.
Step 4 — Publish your survey
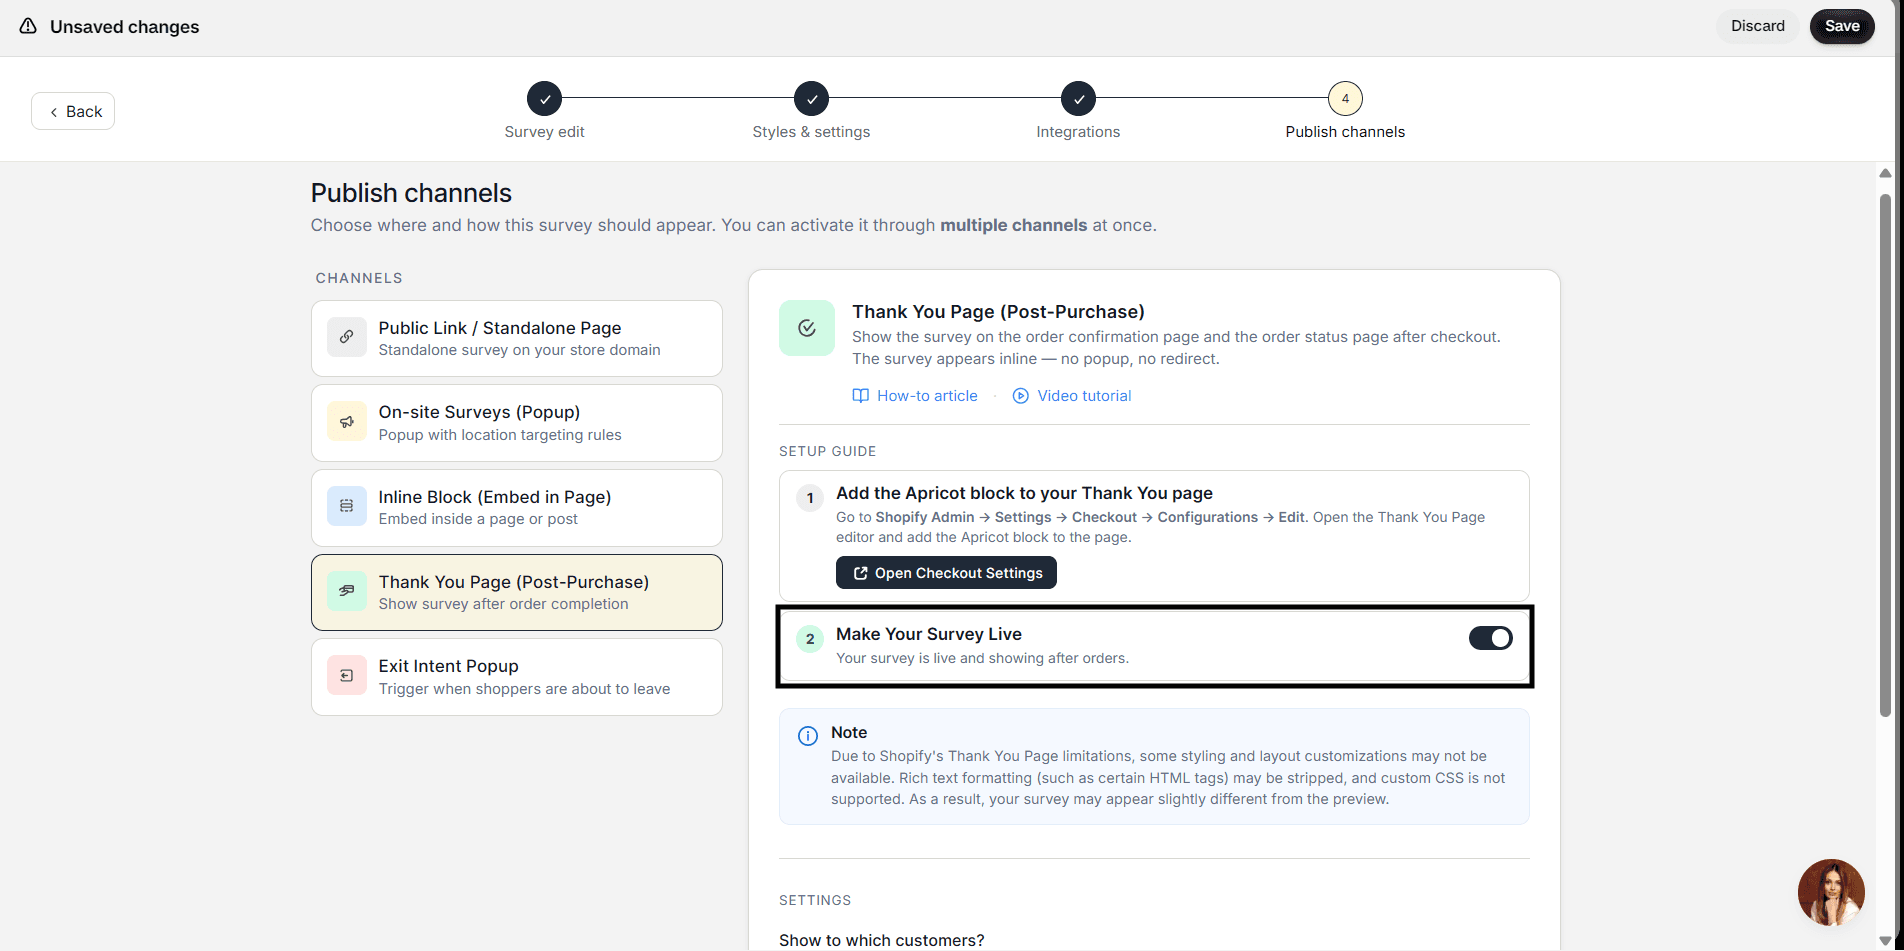
On the Publish tab, choose the Thank You Page (post-purchase) publish type. Note the message at the bottom: Shopify places limitations on thank you page interfaces, so the preview may differ from the actual look on your storefront. Just something to be aware of before publishing.
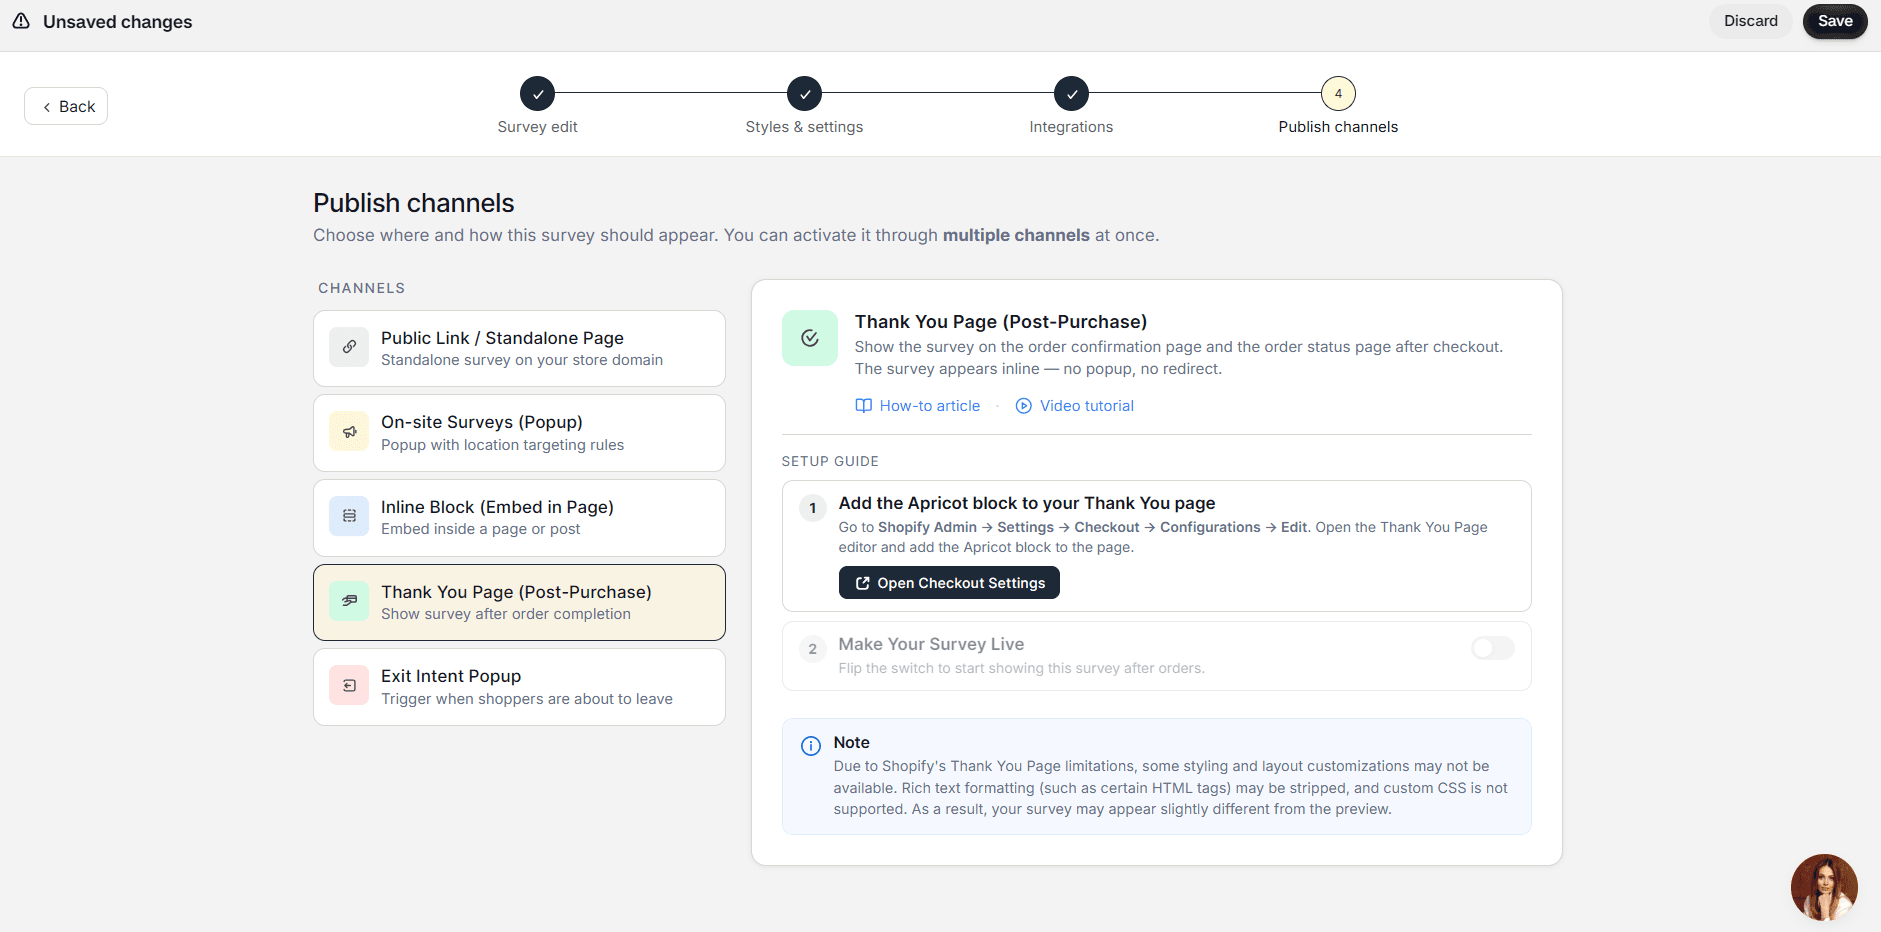
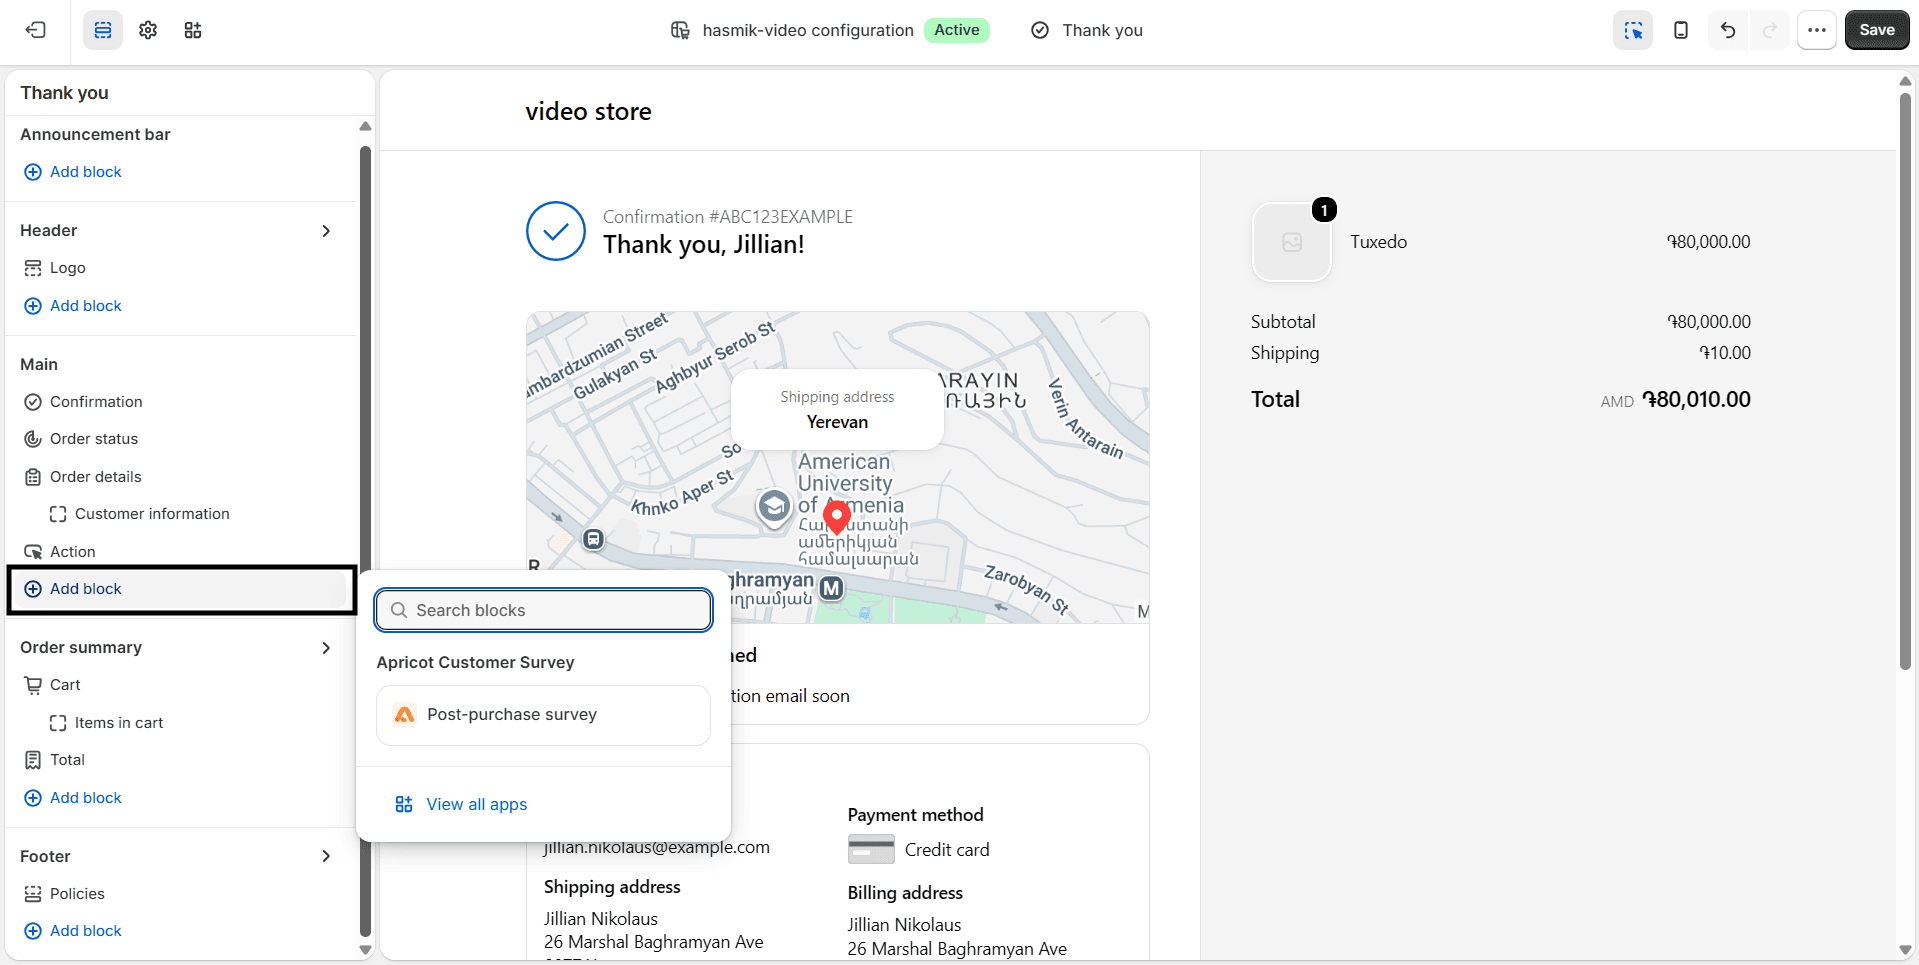
Next, click “Open Checkout Settings” to go to your thank you page editor. Click “Add Block,” search for “Apricot,” select your survey, and click “Save” to return to your dashboard.
Back on the dashboard, toggle “Make your survey live,” save, and you’re done.
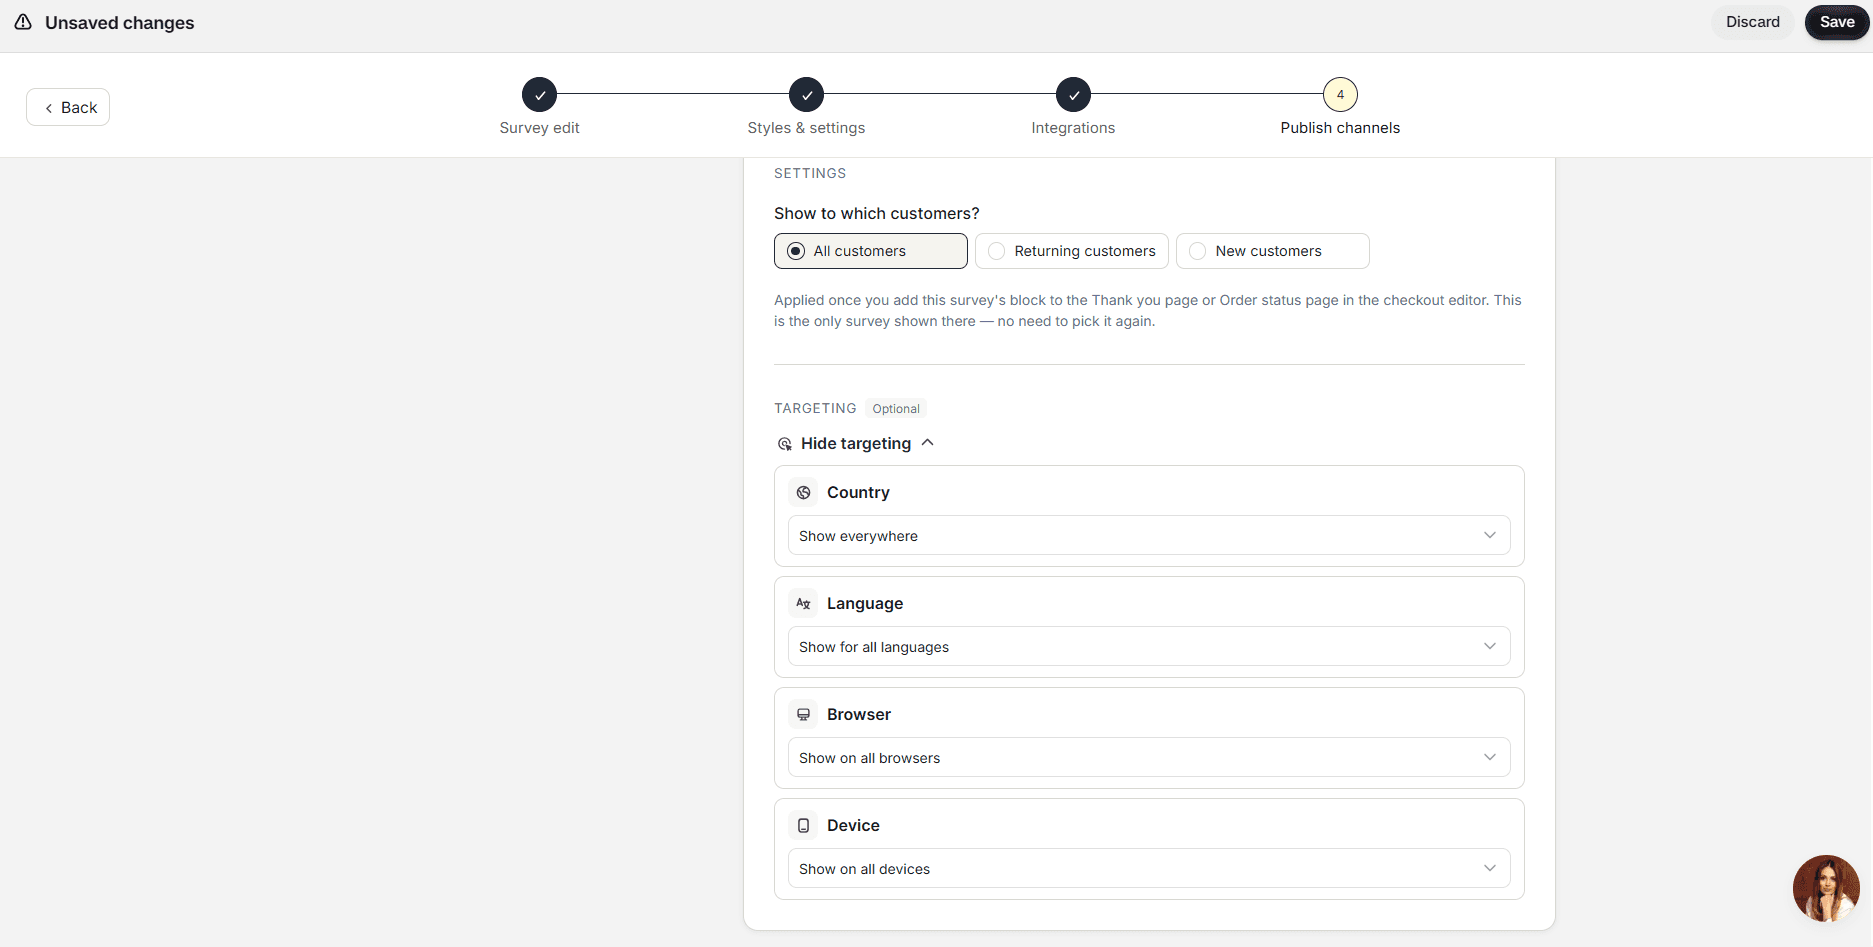
You may want to adjust a few more settings depending on who you want to target. Apricot supports targeting customer groups (all, returning, or new) as well as customers by country, language, browser, and device.
And this is what the final result can look like:
Tips and tricks to maximize survey response rates
Because customers don’t get anything in return at that moment, they aren’t naturally inclined to complete a survey. It needs to be small, quick, interactive, and engaging — never a burden. (In return, customers eventually get a better experience and even better prices, but that isn’t obvious to them at first.) A few things help you get more responses:
Use single-click response formats
No customer wants to write an essay. Use multiple-choice or single-choice questions for the simple ones, and optionally leave space for customers to write more.
Use conditional logic
If a customer has already answered the first half of the survey, they’re more likely to answer follow-ups — so make those as relevant as possible. Use conditions to get specific answers.
For example, ask “Is there anything stopping you from making a purchase?” with the answers No, Shipping cost, Sizing, Other. If the answer is shipping cost, the immediate follow-up could be “What price would have worked better for you?” Build conditions like this for every possible answer.
Customize and style your theme
It’s simple, but if the survey doesn’t look engaging — or even a little gamified — fewer customers will submit it. Make good use of the customization tools.
Consider a one-question survey
If you’re nervous about introducing a survey, pick the one thing your brand most needs to know and focus on it. For example, make attribution the goal and ask only “How did you hear about us?” It limits what you learn, but it gets far more people responding.
Conclusion and next steps
Publishing a survey in your Shopify store is a great move to gain genuine customer understanding. Post-purchase email surveys tend to struggle with engagement, while a survey on the thank you page, done correctly, opens many opportunities: improving your checkout flow, finding your best marketing attribution channels, and collecting valuable data to personalize future campaign flows.
Just make sure you use the right tool. A good app should provide analytics, offer many question types, be highly customizable, and be easy to use, so you don’t have to build a survey from scratch.